Automated Git Repository Deployment in cPanel: A Step by Step Guide

Software Engineer | Content Creator
Manually updating files on your cPanel's public_html folder is boring and time consuming job. But we can easily automate this system by following some simple steps. We can connect our git repository to cPanel and then every time we push a new commit to production branch it will be automatically synced to public_html folder. Follow this guide and you will be able to do that so.
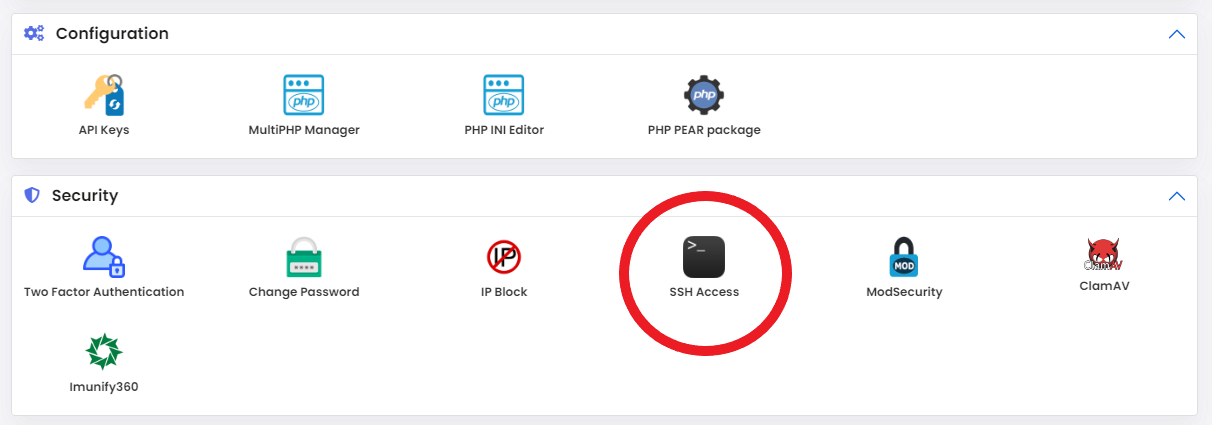
Step 1: Generate SSH Key Pair in cPanel
From cPanel click on "SSH Access". Normally it is located under Security
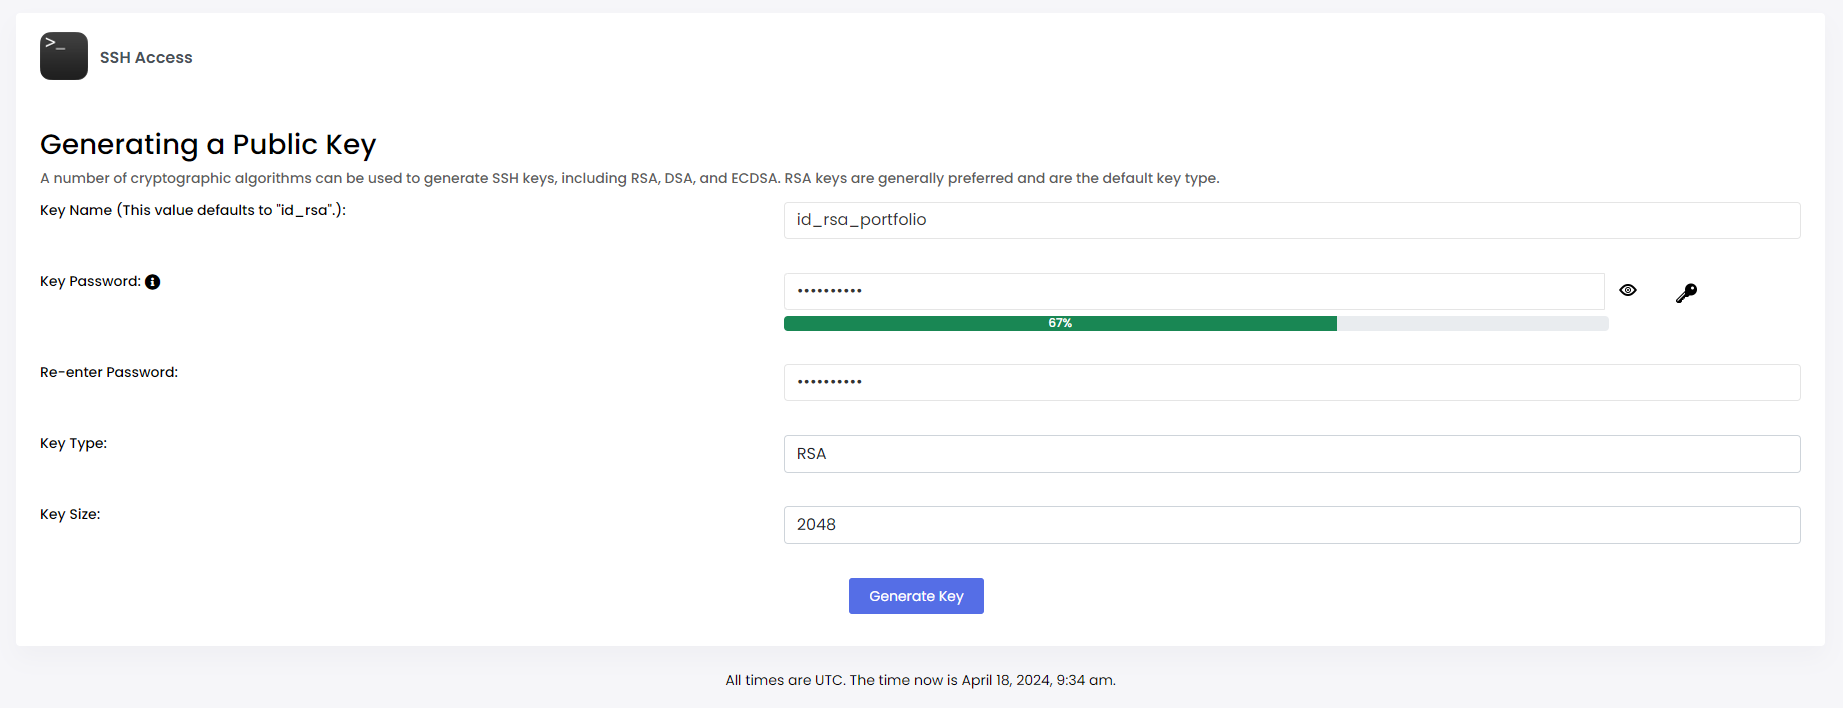
Then click on "Generate A New Key". If you don't see that button click on "Manage SSH Keys" then you will find Generate key button.

Now you will see a simple form. Insert the Key Name and Key Password and click on Generate Key button. You can write the password somewhere else for any future issues.
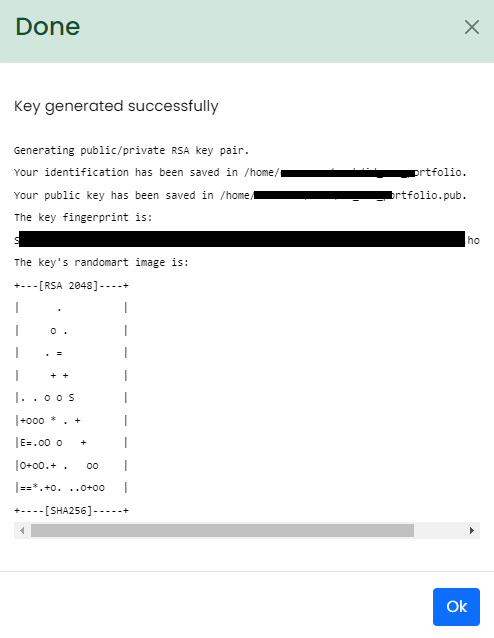
If the key is generated successfully you will see something like that. Click on "Ok" or “Go Back” to return to “Manage SSH Key” page.
You should see your newly generated key name under Public Keys. If you see “not authorized”, simply click on “Authorize” or "Manage" > "Authorize" to authorize your key.
Then click on "View" or "Download" button to view your public key. Now copy the full key and follow step 2.
Step 2: Add SSH public key to git.
For this article I will use Github. But you can use gitlab, bitbucket etc too. I assume you already have your project into git
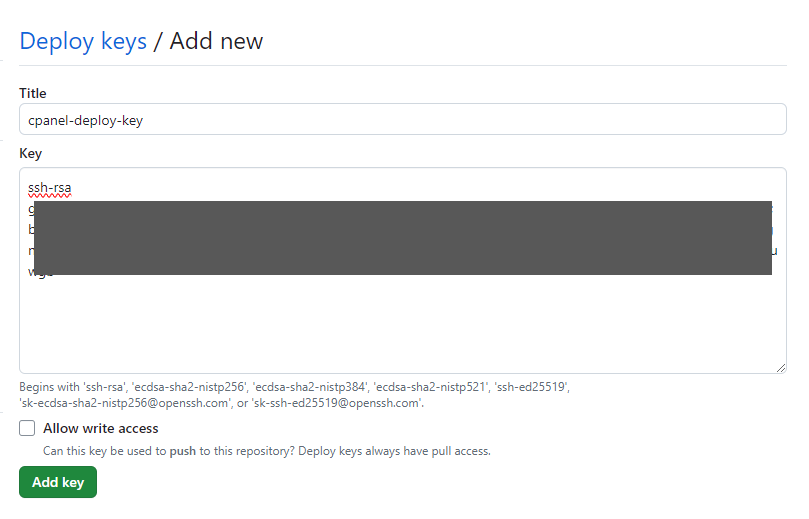
Now, inside Github repo select the settings tab. Select "Deploy keys" from the left panel. You can see there is an “Add deploy key” on the top right corner. Click on it.
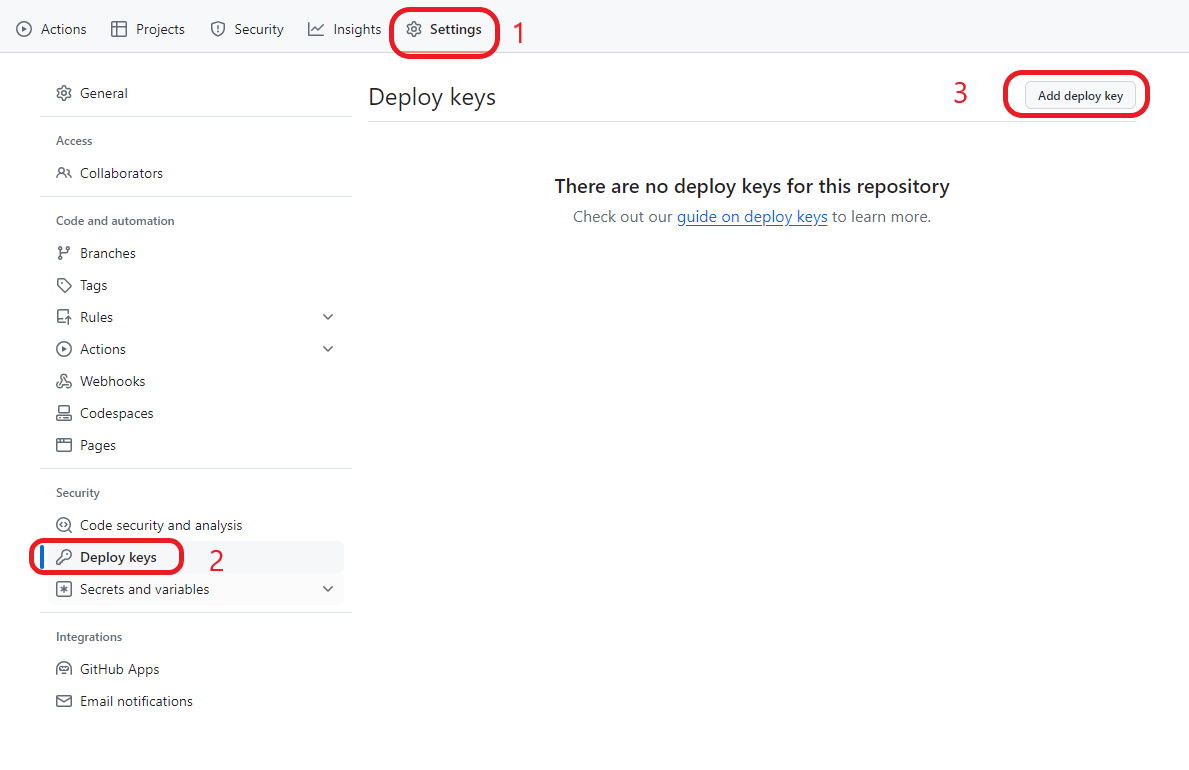
Add any Title and paste the Key that you copied from your cPanel. And then press “Add Key” button.
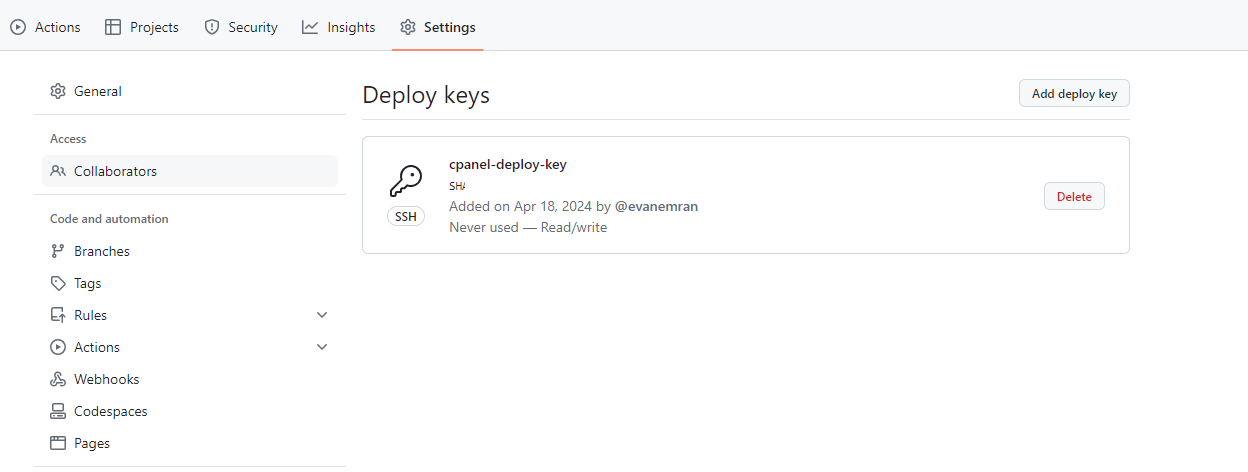
And all done! The key should be listed like below.
Step 3: Add the cPanel deploy script.
Open your project and add a file named .cpanel.yml into the root directory. Add the following lines inside your project.
---
deployment:
  tasks:
    - export DEPLOYPATH=/home/YOUR_CPANEL_USERNAME/public_html/
    - /bin/cp -R css $DEPLOYPATH
    - /bin/cp index.html $DEPLOYPATH
Let’s explain, it’s very simple.
The DEPLOYPATH is the path where the project will be deployed. You can see, it is set to public_html directory. You can change it to any other sub-directory if you want(i.e. /public_html/portfolio/).
DO NOT forget to change “YOUR_CPANEL_USERNAME” with your own cPanel username.
You can see “-R” is added before css. That’s the way you add a folder and all it’s contents to deploy.
To deploy files(i.e index.html) you have to add it one by one.
So now, change this file as your project needed. Commit the changes and push to your Git repo.
Step 4: Clone the git repo
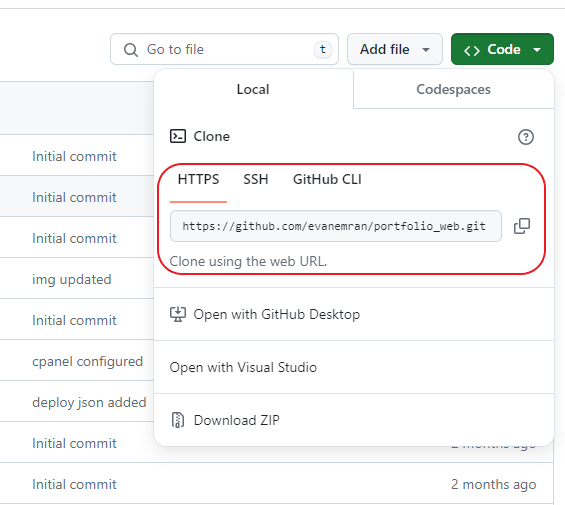
Go to your Github repo and copy the https clone url.
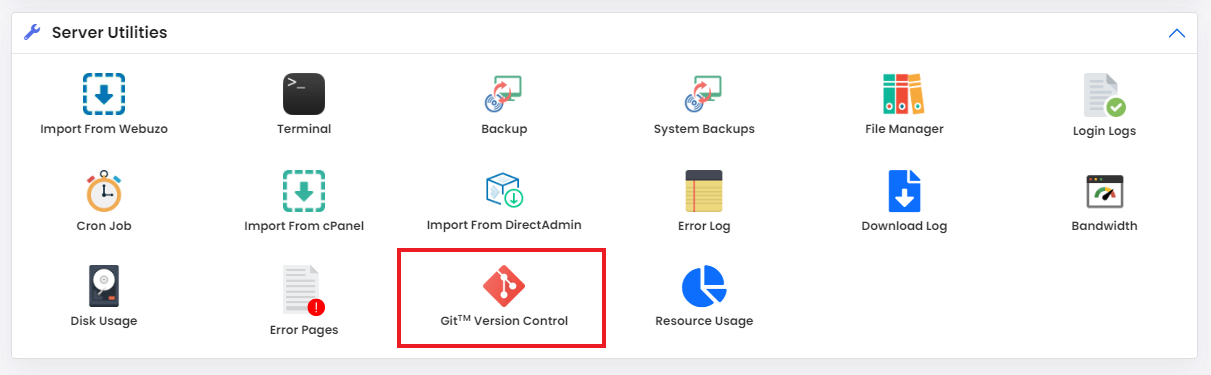
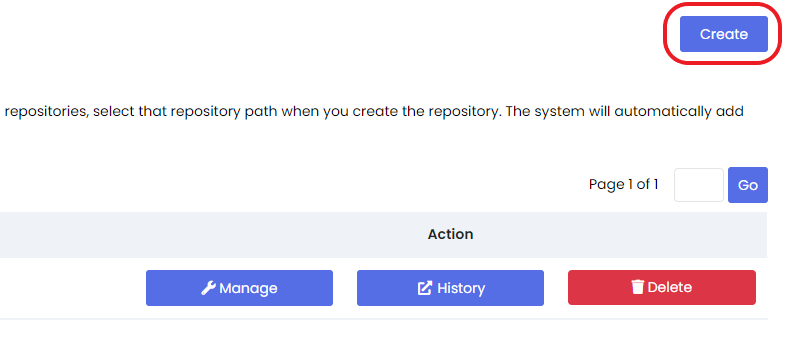
Go to your cPanel and click on “Git Version Control” under FILES.
In the next screen, click on “Create” button from the right side
Paste your Github Clone URL. By Default your Repository Path will be /home/YOUR_CPANEL_USERNAME/git/repository directory. You can change it if you want. But, I do not recommend that. Next add/change the Repository Name. Finally press the “Create” or "Save" button.
If you face any error in this step, it's because of the SSH key. Follow step 1 again to solve this.If that also doesn't work, then create a Auth Token from GitHub and rewrite your Clone URL as below
https://<username>:<token>@github.com/<repository_name>.git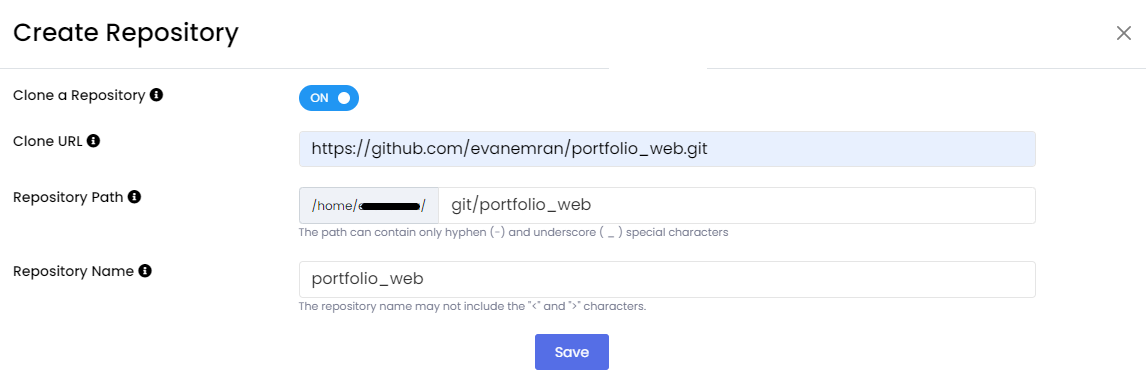
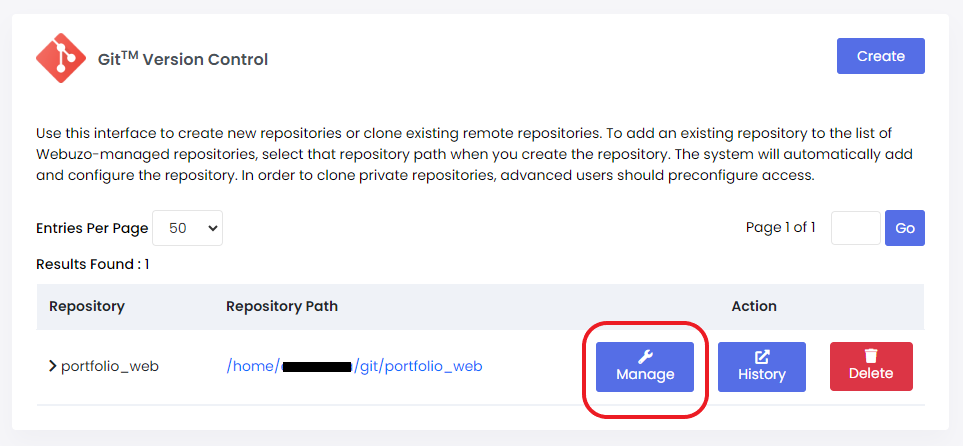
If everything is fine you should be redirected to this page and you should see your repo in the list. Now, click “Manage” button.
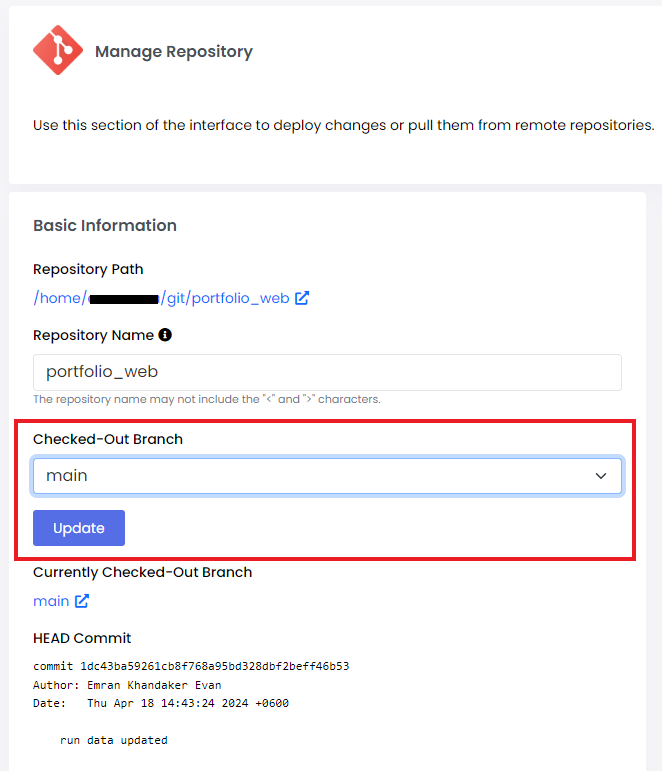
Here you can select the branch you want to deploy. Then click “Update”. After that go to “Pull or Deploy” tab.
The FINAL step. Here you will see the last commit you made in the branch which you want to deploy. If you don’t see that, click “Update from Remote”. If everything is good to go, click “Deploy HEAD commit”. If it’s success, you will see “Last Deployment Information” as below.
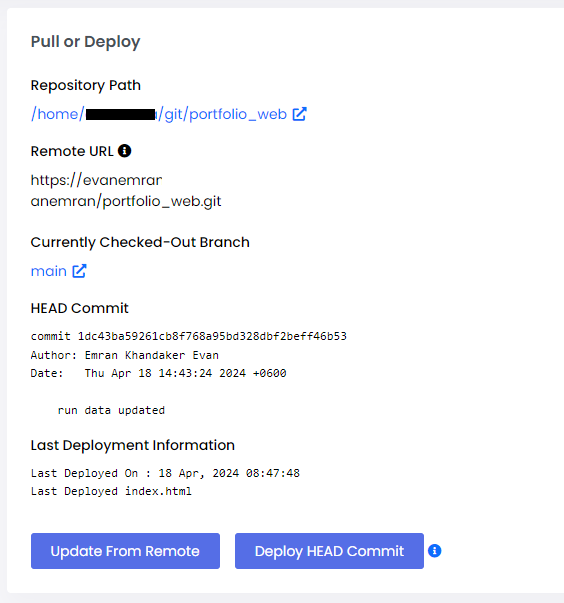
Now if you go to your File Manager public_html folder you should see the new files there.
If the deployment is failed please check the following:
FIX 1: Check your .cpanel.yml file carefully and check if everything is okay
FIX 2: If you are using subdirectory in public_html, go to File Manager -> public_html and create the subdirectory if they are not already there. Now try to deploy again.
FIX 3: Click “Remove” and delete the repo from the repository list and clone it again. After that try fix 2 and then deploy again.
That's all for this article. I hope it was helpful for you. Feel free to leave a comment if you face any issue with the steps.